Conditional Formatting
Sets different formatting (styles) to rows, columns, and cells of normal and intersection tables based on conditions/selections (rules). These conditions can be a fixed value, a range of values, greater than a certain value, etc.

Conditional formatting allows you to modify the following table rows and/or columns properties based on the condition set for each rule:
- Rows, columns (Cross Table), and cells background color;
- Font color;
- Font styles (bold, italic, and underline);
- Add icons (symbols) to cells (Only when the rule is applied to the columns. Except for the pivot 2 Cross Table).
- Pick the symbol’s color;
To facilitate the formatting settings, we have made available default formatting options where you just have to create the conditions to apply the formatting.
There are two ways of applying the conditional formatting to the TaticView tables. Apply rules through rows (object rules), which will be implemented to the table rows
or apply rules through column/cell, where the formatting will only be applied to the table's columns/cells, or apply rules through column/cell, where the formatting will
only be applied to the table's columns/cells.
Rows rule
This type of rule will be implemented to every row of the table if the rule condition is true.
To create rules to table lines, all you have to do is select the desired object and select the option Conditional Formatting on the Object tab on the sidebar.
The following screen will be shown when you've created a new rule for a certain row.
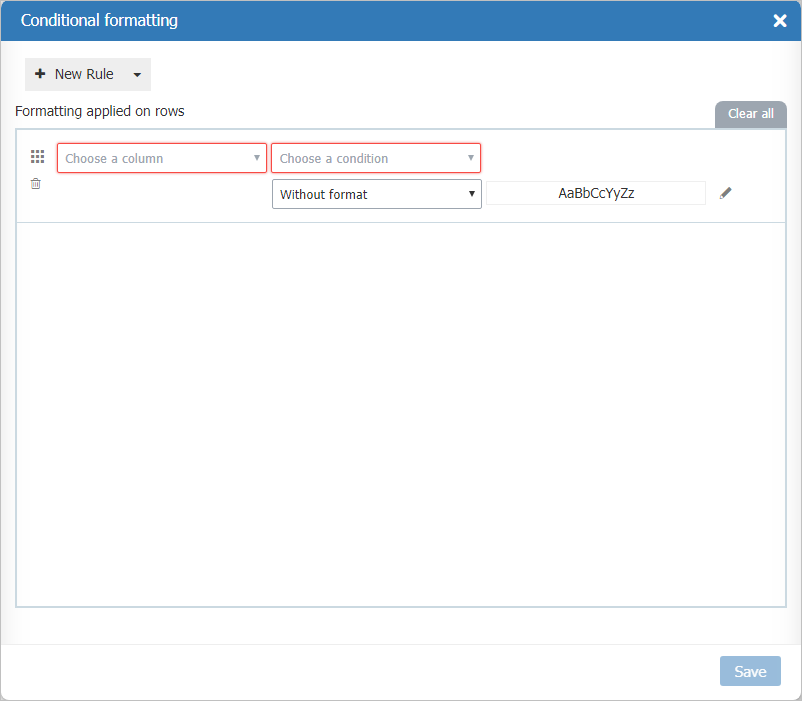
A rule will be automatically created where you'll have to choose what reference column, condition to the formatting implementation, and also the desired formatting.
The rules for the rows can have the following properties edited:
- Font styles (bold, italic, and underline);
- Font color;
- Background color;
Besides, all these rules have the following pre-set formattings:
- Blue background - applies a blue background to rows that fit into the rule condition.
- Green background - applies a green background to rows that fit into the rule condition.
- Yellow background - applies a yellow background to rows that fit into the rule condition.
- Red background - applies a red background to rows that fit into the rule condition.
We also provide a set of predefined rules to apply to the rows. This set of rules creates three rules applying different background colors to the rows.
All you have to do is to set the reference column and the condition to apply the formatting.
Columns rules
The columns rules are applied only to the desired column or cell on which the condition is true.
To create the rules for the columns/cells, you need to select the column where you want to apply the conditional formatting, and then click on the Conditional Formatting option on the Column tab on the design sidebar.
This type of rule also allows you to add symbols to the columns/cells.
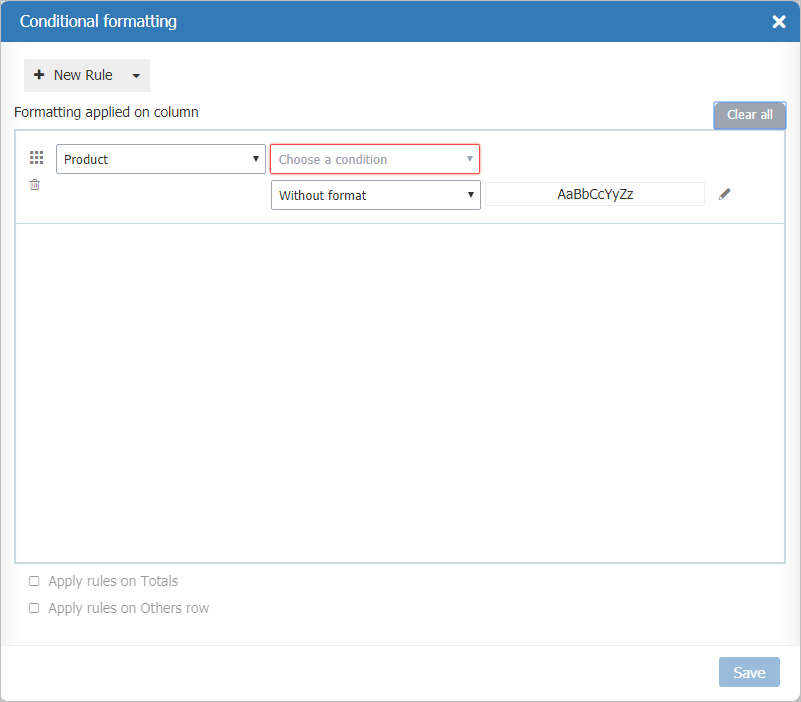
The following screen will be shown when you create a new rule to the columns.
- If the column type is text:
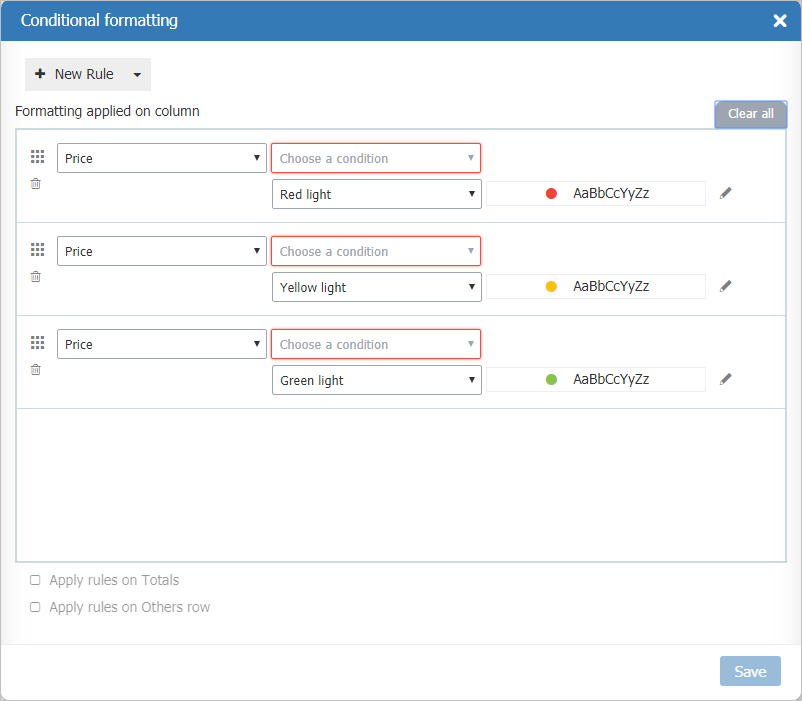
- If the column type is numeric:
To facilitate use, just like the rules for the rows, rules are created automatically. You'll only have to define the condition and the formatting rule.
One rule will be set to text columns and three for numeric columns. Besides, you can also create new rules or edit/delete an automatically created rule.
The rules for the columns can have the following properties edited:
- Font styles (bold, italic, and underline);
- Font color;
- Background color;
- Icon;
- Symbol color;
Besides that, these rules also have the following predefined formatting:
- Blue background - applies a blue background to rows that fit into the rule condition.
- Green background - applies a green background to rows that fit into the rule condition.
- Yellow background - applies a yellow background to rows that fit into the rule condition.
- Red background - applies a red background to rows that fit into the rule condition.
- Blue traffic light - Adds a blue traffic light to rows that fit into the rule condition.
- Green traffic light - Adds a green traffic light to rows that fit into the rule condition.
- Yellow traffic light - Adds a yellow traffic light to rows that fit into the rule condition.
- Red traffic light - Adds a red traffic light to rows that fit into the rule condition.
We also provide three predefined sets of rules to be applied to the columns/cells.
- Background color: Creates a set of rules that will be applied as Background Color to the selected column;
- Traffic lights: Creates a set of rules to apply traffic lights to the selected column;
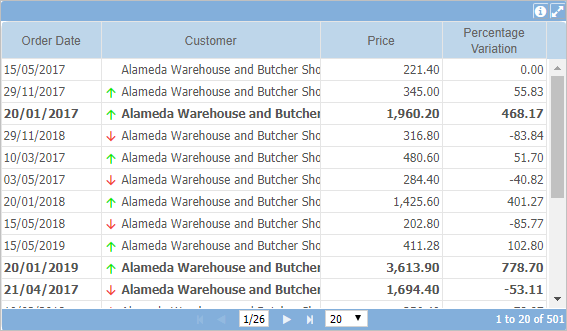
- Directional: Creates a set of rules to apply directional arrows to the selected column;
You will only need to configure the reference column ( the column that is going to be evaluated by the condition) and the condition to apply the rules.
Apply on:
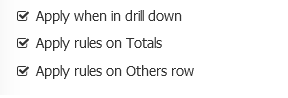
The rules for the columns also allow them to be applied to Totals (total row and total column), Others row when they are shown in the tables and Drill down process.
Be careful when applying the rules in the drill down, because some formatting may not reflect the test applied, especially when they are absolute values.
Creating a rule
Click the button + New Rule on the Conditional Formatting or use one of the predefined set of rules by clicking on the arrow next to this button.
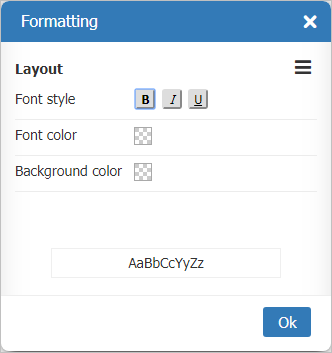
It is possible to select the reference column (the column that is going to be available), the condition to apply the rule and to define the value or range of figures that are going to be tested by the condition when you create a new rule. It is necessary to define the format of the condition for applying the rule after it has been configured. There are predefined formatting options, but it is possible to edit a custom formatting by clicking over the ![]() icon. In this case, the following screen will be shown, allowing to edit the available properties.
icon. In this case, the following screen will be shown, allowing to edit the available properties.
- Row rules
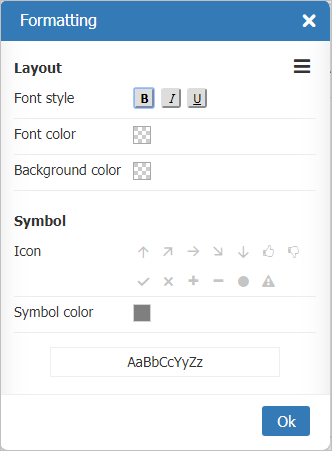
- Columns rules
You can add as many rules as you like.
Examples of Rule Settings:
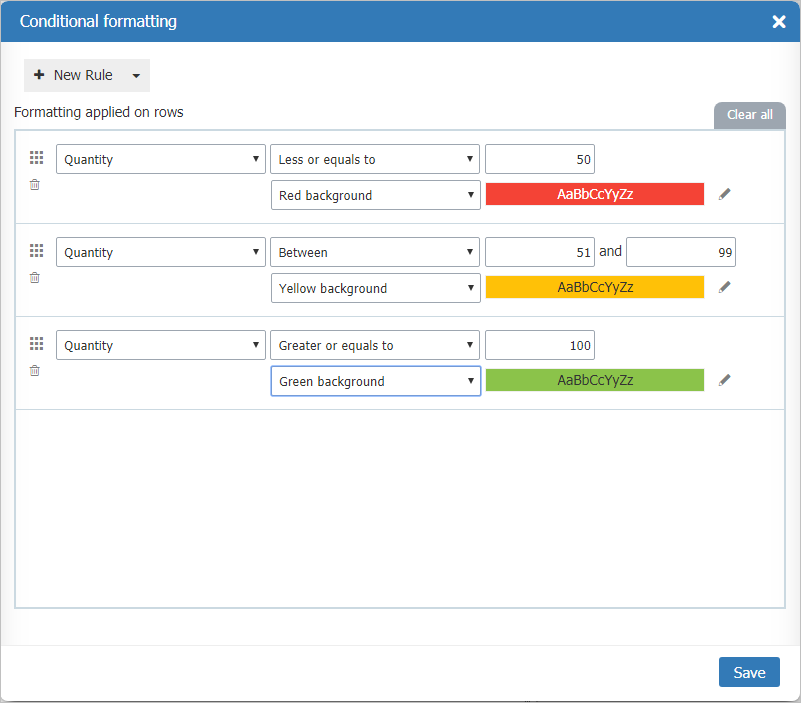
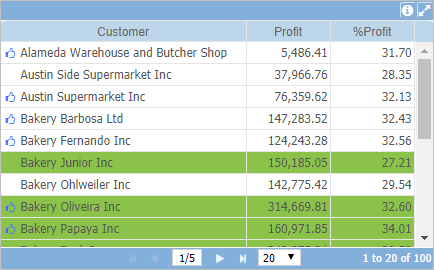
On the example above, three rules were added that modify the row's background color if the condition is true.
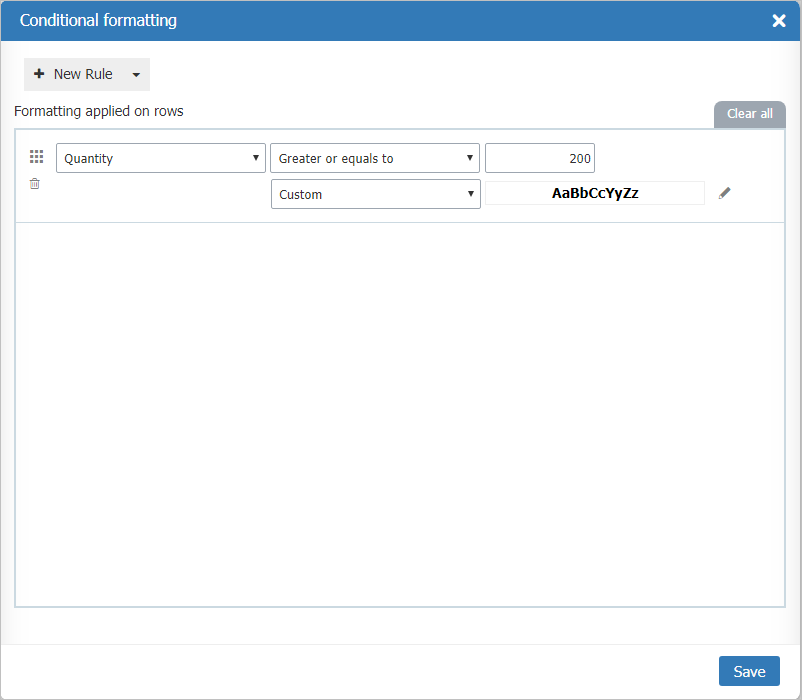
In this example, it was added a rule that applies the bold font to the row.
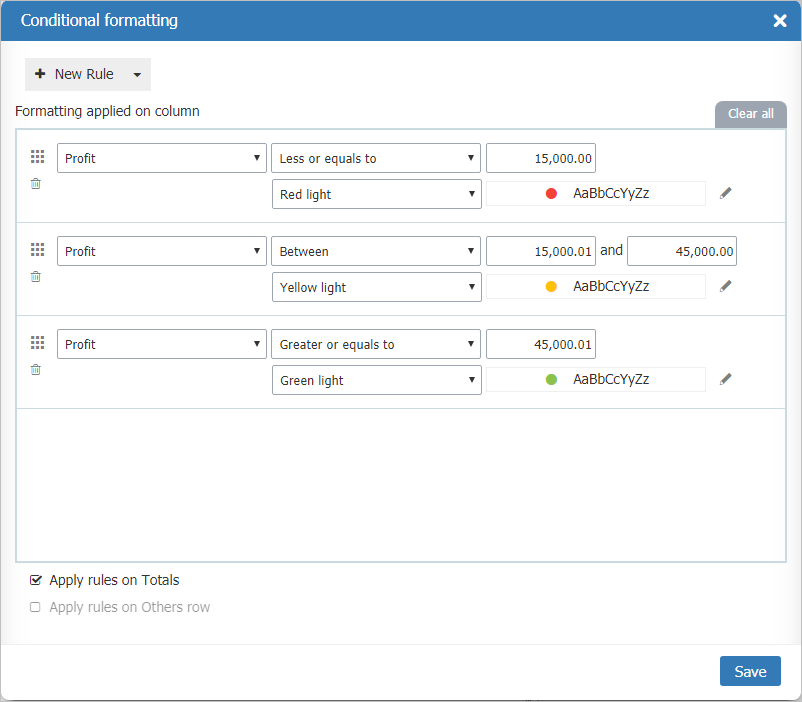
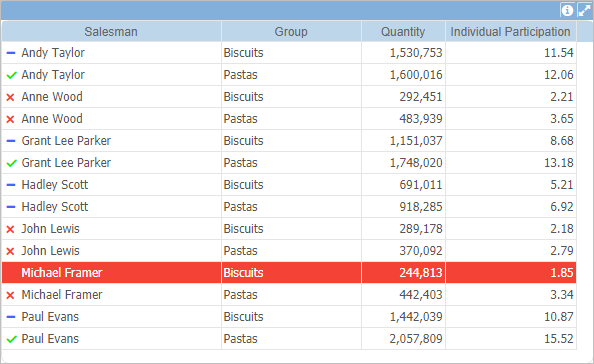
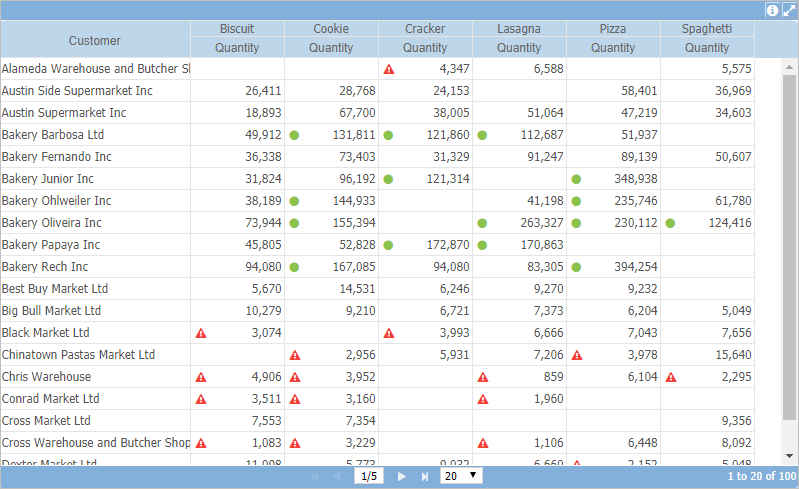
Here we are adding three symbols (traffic lights) determined by the values of the column and apllying in the totals.
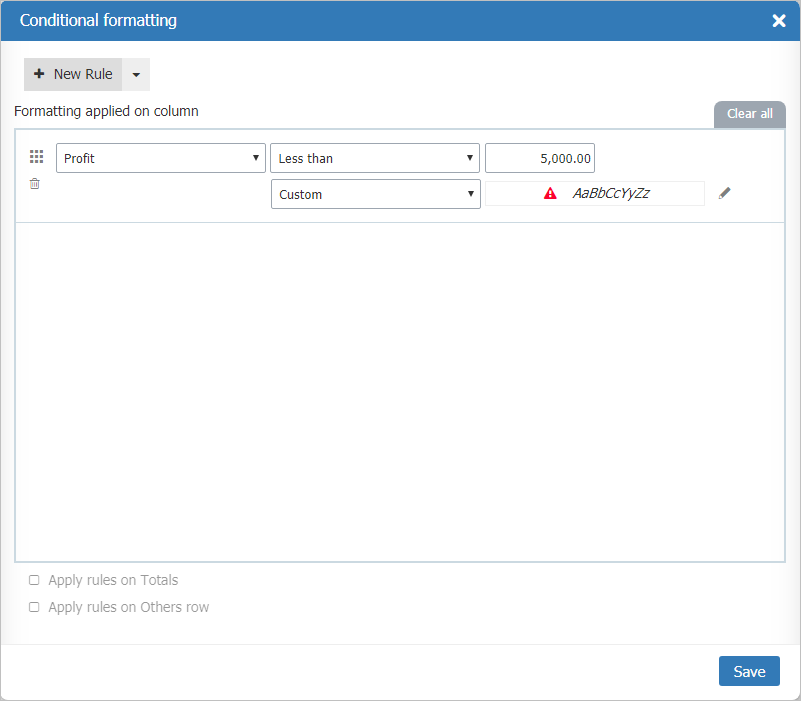
In this example, we are adding an alert symbol and applying italics when the Profit are below 5,000.00.
Deleting a rule
To delete a rule, you have to click the icon ![]() on the rule you want to remove. Use the button
on the rule you want to remove. Use the button ![]() to delete all rules.
to delete all rules.
Changing the order of the rules
You have to click the icon ![]() and drag the rule to the desired position to change the order of the rules. Sometimes is necessary to change the order of the rules to define an application priority. For example, the last rule on the screen has priority over the first rule. In case the rules modify the same priority. The rules are applied individually if they modify different properties.
and drag the rule to the desired position to change the order of the rules. Sometimes is necessary to change the order of the rules to define an application priority. For example, the last rule on the screen has priority over the first rule. In case the rules modify the same priority. The rules are applied individually if they modify different properties.
Important:
- The last rule has the preference in case two rules modify the same row/column priority (background color, font color, etc).
- The columns/cells rules have priority over row rules.
Applies to
Examples of tables with applied rules