Essa seção irá lhe mostrar como importar um novo arquivo de dados.
Veja também:
- Veja um Tutorial em vídeo
- Guia de importação Excel
- Problemas com Importação
- Baixe um arquivo de exemplos aqui: Vendas.xlsx
Primeiro selecione a opção Novo arquivo do Menu (Lateral) na Página Principal;

Na próxima tela.
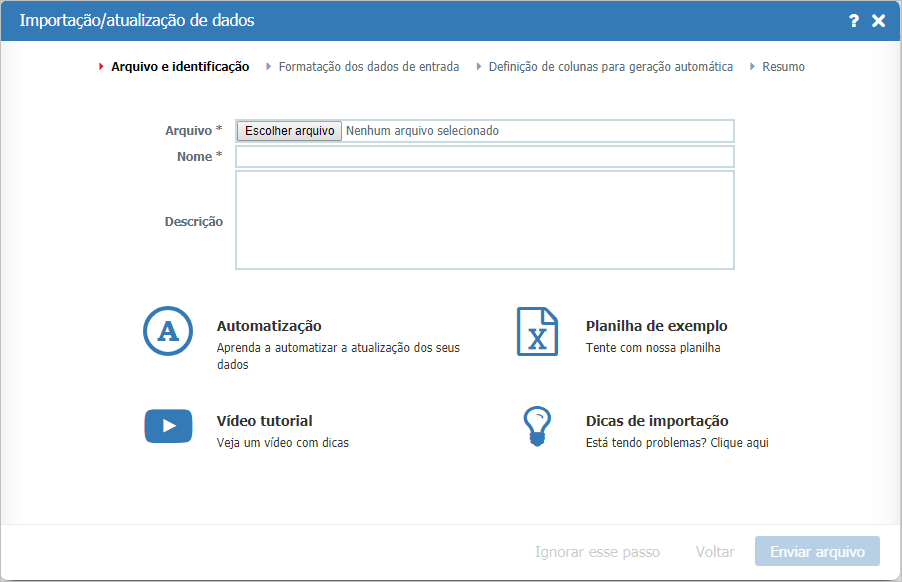
- Arquivo: Escolha o arquivo a ser importado. Pressione o botão "Selecionar Arquivo" para escolher o arquivo no seu computador. Veja Arquivos de dados suportados para mais informações;
- Nome: Nome do Arquivo de Dados. Esse nome aparecerá na main page/pt-br;
- Descrição: Uma descrição opcional para o arquivo de dados.
Se você continuar com dúvidas clique nos links "Vídeo Tutorial", "Planilha de Exemplo" and other "Dicas de Importação".
Pressiona o botão Enviar Arquivo para continuar.
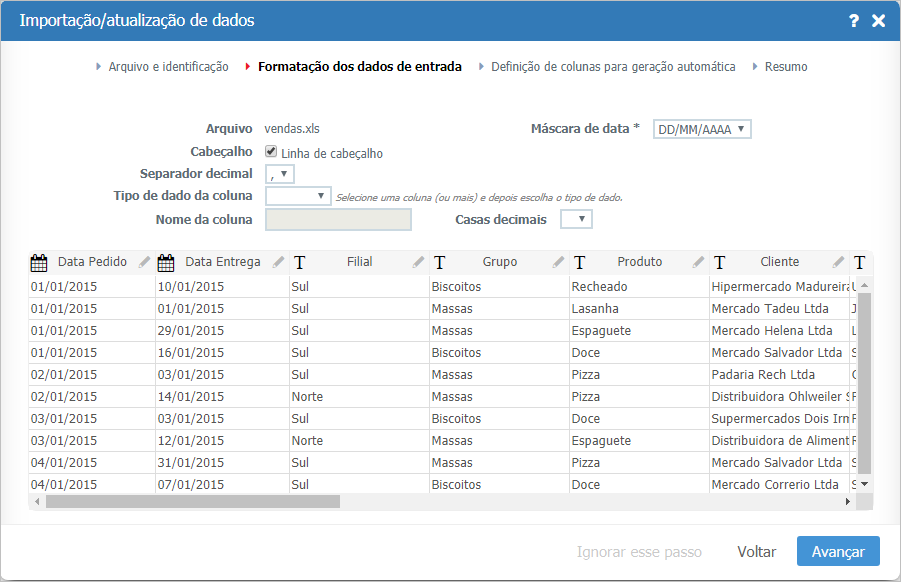
Na próxima tela você deve informar as especificações do arquivo.
- Conjunto de caracteres: Define a codificação de leitura do arquivo. Normalmente a opção correta é automaticamente selecionada. Somente arquivos CSV;
- Linha inicial: Define qual a linha que o processo de importação deve começar a carregar. Cabeçalhos devem ser considerados se a opção Cabeçalho estiver habilitada. Somente arquivos CSV;
- Máscara de data: Define o formato de leitura dos campos Data. O formato selecionado deve ser exatamente igual ao formato que as datas estão no arquivo. Somente arquivos CSV;
- Separado por: Define o delimitar de colunas do arquivo. Escolha entre Tabulação, Ponto e vírgula, Vírgula ou Outro caractere (e digite o caractere manualmente). Normalmente a opção correta é automaticamente selecionada. Somente arquivos CSV;
- Header: Check if the file have a Header row that identifies the columns. The header will be used as the default name for the columns in the data source;
- Decimal Separator: Specifies the decimal separator used in the file.
- Columns options: Click the column header in the preview table to select and change its options:
Notes:
- Is very important set the right type for each column. When the type isn't right normally NULL will be show in the cells.
- The Formula columns show the expression used in the spreadsheet or text file.
- When you add new columns in the imported file the header color will be red.
- You can´t delete existing columns in data source.
Click the Next button to continue.
If you are updating a data source, go directly to the import summary.
On the next screen you can generate automatically a set of dashboards with your imported data.
The process will try to find compatible dashboards with the information you provided. New generated dashboards will have the ![]() icon.
icon.

Select the main Date, Text and Value columns that TaticView will use to automatic generate dashboards.
Click the Next button. To skip the automatic dashboards generation, click Skip step. You can do this later. See Generate dashboards.

Check the summary information and click the Finish button to complete the operation and schedule the data import.
Use the Refresh option in the main page to update the data source information with it current status and check whether the import is finished.