Difference between revisions of "Share dashboards/pt-br"
(Created page with "- verificar o status de cada convite enviado;") |
(Created page with "- alterar as permissões de cada convite enviado;") |
||
| Line 53: | Line 53: | ||
- verificar o status de cada convite enviado; | - verificar o status de cada convite enviado; | ||
| − | - | + | - alterar as [[Permission filters/pt-br| |
| + | permissões]] de cada convite enviado; | ||
- grant [[Write permission|written permission]] to the guest; | - grant [[Write permission|written permission]] to the guest; | ||
Revision as of 19:06, 19 September 2018
Você pode compartilhar seus* painéis com outros usuários (veja um tutorial em vídeo (inglês)).
Funcionalidade que permite que você organize, controle, filtre e distribua suas informações com segurança, praticidade em maravilhosos painéis.
Utilizando permissões é possível criar um único painel com toda informação necessária e compartilhar com cada usuário apenas o que eles precisam ver.
* Não é possível compartilhar painéis que foram recebidos por meio de outros compartilhamentos;
* Para compartilhar painéis, você deve ter o recurso Usuários compartilhados contratado;
Criando um novo compartilhamento
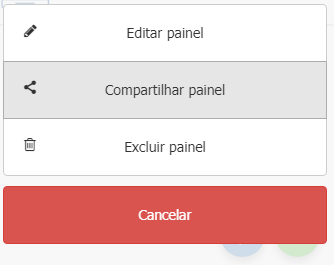
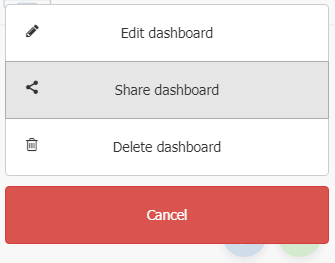
Para compartilhar um painel, você deverá acessar a opção Compartilhar painel, disponível no menu de contexto de cada cartão de painéis ou então utilizar a opção de compartilhamento disponível durante a execução do painel:
No desktop 
Nos dispositivos móveis 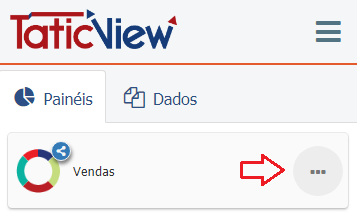
Durante a execução (desktop e dispositivos móveis) 
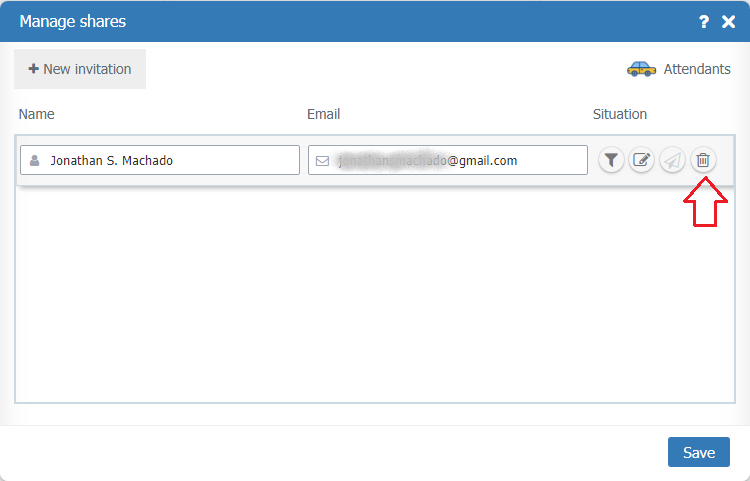
Ao fazer isso, a tela Gerenciar compartilhamentos é exibida:
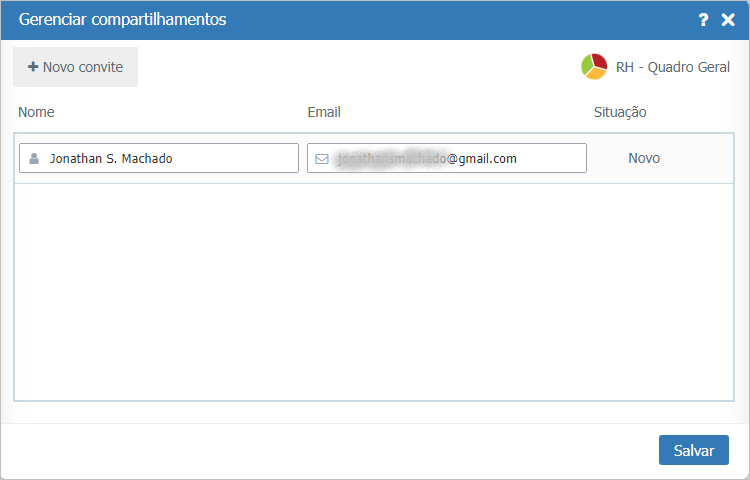
Nesta tela você poderá, além de adicionar novos convites de compartilhamento:
- verificar com quem já compartilhou este painel;
- verificar o status de cada convite enviado;
- alterar as permissões de cada convite enviado;
- grant written permission to the guest;
- resend an invitation that is pending;
- remove an invitation sent;
- change the name of a guest (useful to make it easier to find them in the list of suggestions displayed when adding a new guest);
When you click New invitation, a new entry will be added on the screen to inform you the name, email, and guest permissions settings:

To save and send the invitation, just click Save button. If this is disabled, check that the data (name and email) were filled in correctly.
Another way to share dashboards is by using the Share dashboards option in the menu on the Dashboards tab of the main page:
On desktop 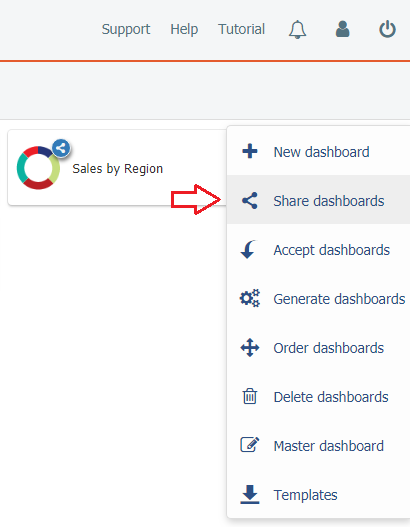
In mobile devices 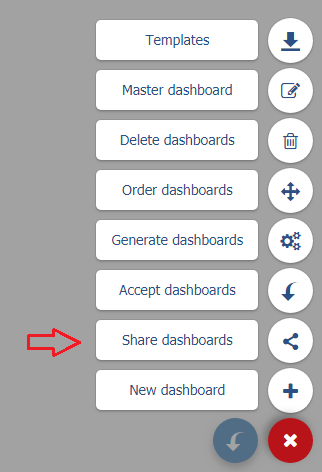
In this case, the following screen will be displayed:
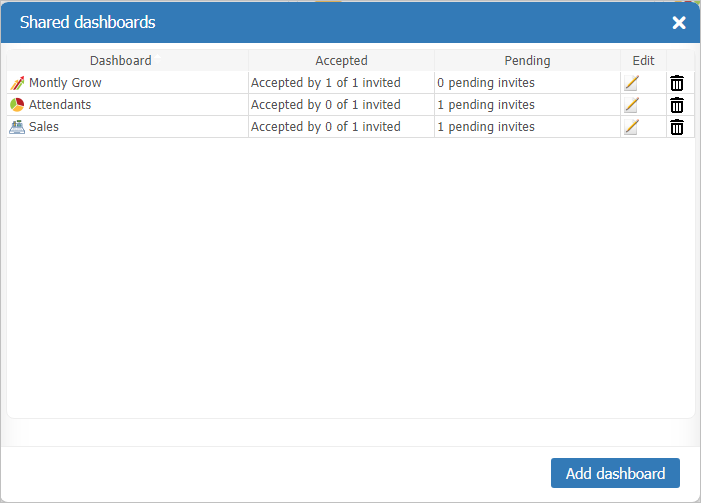
In this screen you can, in addition to adding new dashboard for sharing:
- check how many invitations have already been accepted for each shared dashboard;
- check how many invitations are still pending;
- edit a share;
- remove a share;
When you click Add dashboard, the list of panels is displayed so that you can select what you want to share.

Selecting a dashboard will display the Manage shares screen.
Editando um compartilhamento
To edit a sent share, you must access the Manage shares screen (see how to do this in the previous topic Create a new share).
Editing the shares allows you to make the following changes:
- change the name of the guest. This change does not reshare sharing, it only changes the name of the guest on the current share, and updates the name in the list of suggestions that appears when you add new invites;
- change the filters/permissions of the share. Used for when you want to change what restrictions on the data the guest will have;
- change the guest's write permission. Used for when you want the guest to be able to edit the shared dashboard;
- also allows you to resend an invitation that has status pending.
Deletando um compartilhamento
You can remove all shares from a dashboard, as well as remove only one specific invitation.
To remove all shares you send from a given dashboard, you must use the Share dashboards option available in the dashboards tab menu on the main screen. On the screen if it is displayed, just click the delete icon and confirm. With this, all shares of this dashboard will be removed.
On desktop File:Remove all shares en-US.png
In mobile devices File:Remove all shares en-US.png
Or, if you just want to remove a specific invitation, you must go to the Manage Shares screen, using the Share dashboard option available in the context menu of the dashboards and remove only the invitation you want. To do this, just click the Delete Sharing option. Only this invitation will be removed, all other invitations from this dashboard will remain.
On desktop 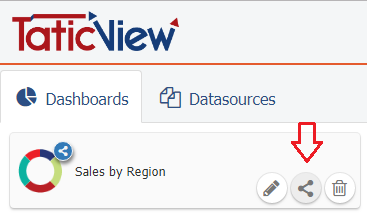
In mobile devices 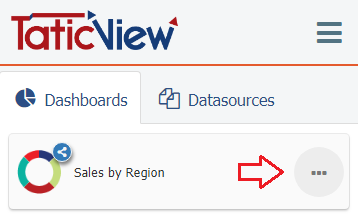
Aceitando um compartilhamento
- Para saber como aceitar um compartilhamento de painéis enviado para você, veja Painéis Compartilhados Recebidos.